Search This Blog

Tuesday 14 September 2021

TO ANIMATE THE COLOR SETTING OF A LAMP

 TO ANIMATE THE COLOR SETTING OF A LAMP

Blender 2.79b
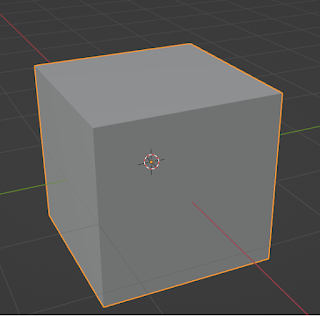
Open a new Blender file with the default objects - A Cube, Camera and lamp.Set up the objects as per details given below.
Settings:

1. Cube- location 0,0,0, rotation to 0,0,0.
2. Camera- location, 7.5,-6.5,5.5 ,rotation 65,0,45.
3. Lamp- location  4,1,6 , rotation  40,0,110. on the  Properties Editor window set lamp  energy to 10 and   diffuse (RGB) value to 1,0,0.
4. View - Camera view by pressing 0 on the Numpad.
5. Viewport shading - Rendered - In the 3D window header.
6. Time line editor window-Set cursor (green line) at frame number 1. End frame to 100.


In 3D window select the Lamp, then in  Properties Editor window,click on the Lamp icon, and then, below the Point lamp button, click RMB on the Red color band which opens up a pop-up menu. Click on Insert keyframe. An yellow line appears at frame one indicating that a key frame is inserted. Now move the cursor to frame 100. Change the color setting of the lamp to 0,0,1. Click RMB on the color band,in the popup menu , click on insert keyframe, a key frame will be inserted at frame 100. Now save the file.Position the cursor at frame number 1.

On the info Editor header, Click on "Render" and then click on "Render Animation". The animation will  be rendered. Once the rendering is done, click on "Render" once again and click on Play Animation. The light color of the Lamp will change from Red to Blue, as the cursor moves from frame 1 to 100.
This effect will be visible with the color of the cube  changing from Red to Blue due to animation of color setting of the Lamp.


Friday 27 August 2021

ANIMATE ANYTHING IN BLENDER

 ANIMATE ANYTHING IN BLENDER


 While you animate the normal parameters associated with an object with Blender like its location, rotation and scale, have you ever wondered whether it would be possible to animate other parameters, which are in plenty in Blender, like the color of the material, the texture applied, the brightness and color of the lamp, the alpha settings or  the shape of a mesh ? 

 The big answer is YES. Practically almost all parameters in Blender can be animated. You want to know how? Just get in touch, or keep watching for my next post.

Monday 26 July 2021

QUERY ON BLENDER BASICS

 1. Do you have any query on Blender Basics ? Do you want want  to know how to do some thing in Blender ?

Send a mail to iblnd300@gmail.com.


2. We also conduct online classes on Blender Basics. Get in touch for more details.

Sunday 25 July 2021

ADD-ON : NODE WRANGLER

                                     ADD-ON:  NODE WRANGLER


INTRODUCTION

Node Wrangler Add-on is an add-on officially bundled with the Blender software. It has to be enabled as explained under the head Add-on in this blog.
Node Wrangler is used to add material and texture to any object designed in Blender using PBR (Physically Based Rendering) image data which gives a near real world material output of the rendered image.

DOWNLOAD
PBR image files can be downloaded from some websites, for free at no cost. Paid versions are also available.These files which are compatible to Blender, are to be downloaded. Normally it  comes as a zipped file, for each texture, from which the PBR files must be extracted and stored in  a distinctly named folder.The extracted files contain color, displacement, roughness, normal, albedo and other geometric data of the image.

APPLYING PBR IMAGE TEXTURE TO AN OBJECT
1. The  UV maps of the 3D model must be subdivided and unwrapped first before applying PBR textures.
2. Split the work area into three : 3d, View Port shading and Node Editor. Select the object in 3D window. Set the Render engine to Cycles.Go to Node editor and check Use nodes and then New. A Diffuse node connected to the output node will be added to this window. Delete the Diffuse node and add a Principled BSDF node and connect it to the Output node(Green to Green socket).

3. With the Principled BSDF node selected, press Ctrl+Shift+T. Now you must open the folder where the PBR files are saved and select all the files for a particular texture and click on "Principled Texture setup" Button at the top right corner.

4. A node tree is setup connecting all the selected files to the principled BSDF node. Save your  file. Adjust the settings in the different nodes and study its effect on the final result shown in the viewport shading window which must be set to "Rendered".


Monday 12 July 2021

AUTO KEYFRAMIMG

 Auto Key framing in Blender eliminates the task of pressing the "I" key o get the Insert popup screen where you click on a particular option to insert a key frame for the selected object.

The steps to do auto key framing are listed below:


1. Let us assume that you want to animate the translate operation of an object, by  moving it  from one point to another in a sequential manner. Select the object  you want to animate.

2. Position the object at the initial position  from where you want to start the animation.

3. Move the cursor(green line) in the Timeline editor to frame number one.

4. Position the 3D cursor in the 3D window. Press I key, in the popup menu, click on location. A key frame will be inserted at frame number one which is indicated by an yellow line.

5. Press the auto key frame button(red button) in the header of the Timeline window.  Activation of the auto key frame is indicated by the background color of the auto key frame button changing to dark grey color.

6. Now move the cursor to  say frame number 20, then move the object to the next location  and press LMB to confirm the location. You will see a key frame is inserted at frame 20, indicated by an yellow line.

7. Repeat step 6 for each new location of the object.

8. When you want to stop auto key framing, press on auto key frame button to de activate this function.

9. Please note that to start auto key framing the first key frame must be set manually.


Wednesday 30 June 2021

BISECT AN OBJECT

 BISECT AN OBJECT


    The steps listed below will guide you to bisect an object into two pieces.


1. Add an object in Object mode. Now switch to edit mode and select all the vertices of the object.

2. If tool shelf is not visible in the 3D window, press "T" key to make it visible on the left side of your 3D window.

3. In the tool shelf, click on Tools > Mesh>Add>Bisect.

4. Place the cursor near the object and draw a line across the object so as to cut across it.Press Enter key to confirm.

5. In the tool shelf, look below, under the panel named "Bisect" you will find three check boxes, Fill, Clear Inner, Clear outer. Selecting clear inner will delete the lower half of the object, selecting Clear outer, will delete the upper half of the object.  Selecting the Fill check box will cover the cut edge with a face.

6. In edit mode, select all the vertices (eight) of  the upper piece, then press "P" key and click on "Selection" option.

7. Go to object mode, Object>Transform>Origin to Geometry.

8. Deselect both objects, select the upper portion and pull it away.


Thursday 27 May 2021

VERTEX GROUP

TO MAKE A VERTEX GROUP FOLLOW THE STEPS GIVEN BELOW:

1. Add an object, go to edit mode and sub divide the mesh once.

2. Go to the properties window in the right, and click on the data block icon which is high-lighted with blue color.
Go down to vertex group panel , click on the  " + "  sign in the right. A "Group" will be added. Select some vertices, in the 3D window on the object which you sub divided and press on the "Assign" button below in the Vertex group panel.. Now the selected vertices will be assigned to a group called "Group" as a default.
Click on the Group name, it will get  into edit mode, delete it and add a new name like "Head-top".


3. The same procedure may be followed to create additional vertex groups.

4. Once vertex groups are formed, any vertex group may be selected here and used for further activities. One example can be adding hair particles to the vertex group called "Head top" to form the hair.


TO MIRROR ARMATURE BONES ON X AXIS 1. Assume that we are making a human rig in standing position. 2. Set the view to front view. 3. Create t...